Police Clearance Certificate (PCC) – Sri Lanka (Online and From Overseas)
You always need Police Clearance Certificate (PCC) for travel, immigration, employment, higher studies, or any other official purpose, you know the process can sometimes feel confusing. Fortunately, if you’re in Sri Lanka—or even if you’re currently living overseas—you can apply for a Sri Lankan Police Clearance Certificate entirely online.
Police Clearance Certificate (PCC)
A Police Clearance Certificate is an official document issued by the Sri Lankan Police Department that states whether you have any criminal record within Sri Lanka. Many countries and institutions require this certificate for various reasons, including:
No matter your reason, applying for a PCC in Sri Lanka is now extremely convenient.
Can You Apply If You’re Overseas?
Yes! One of the biggest advantages of this online application system is that you can submit your request from anywhere in the world. As long as you have a reliable internet connection, a suitable payment method (credit or debit card), and digital copies of the required documents, you can complete the entire process online.
Step-by-Step Tutorial to Get PCC Sri Lanka
Step by step tutorial to get police clearance certificate in Sri Lanka is given below:
Step 1: Visit the Official Website
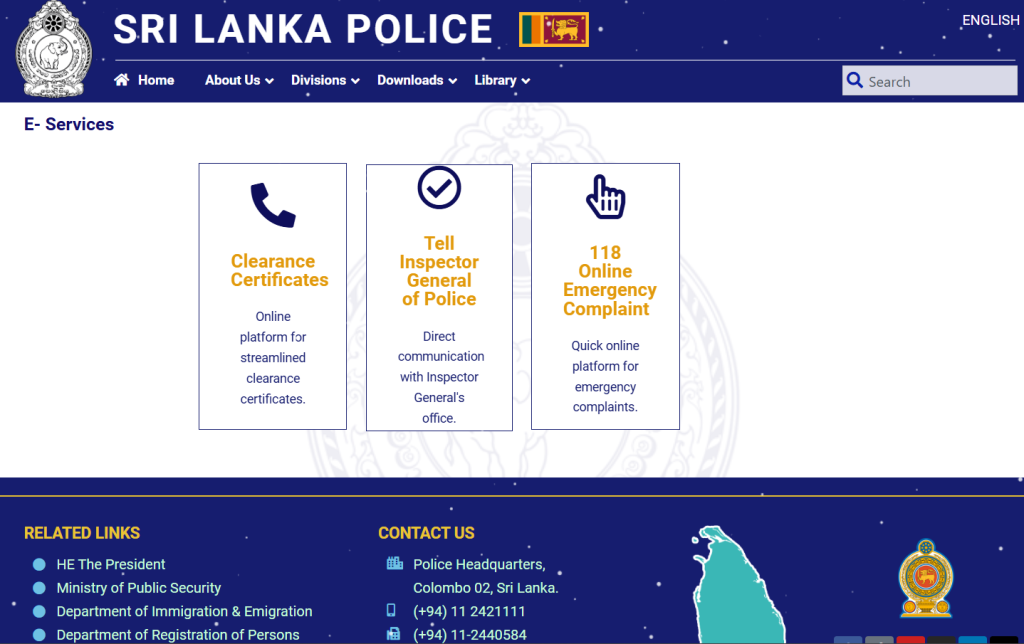
This will direct you to the Police Clearance page. Here, you’ll find instructions and further guidance.
Step 2: Accessing Instructions
Before proceeding directly into the application, it’s a good idea to review the official instructions:
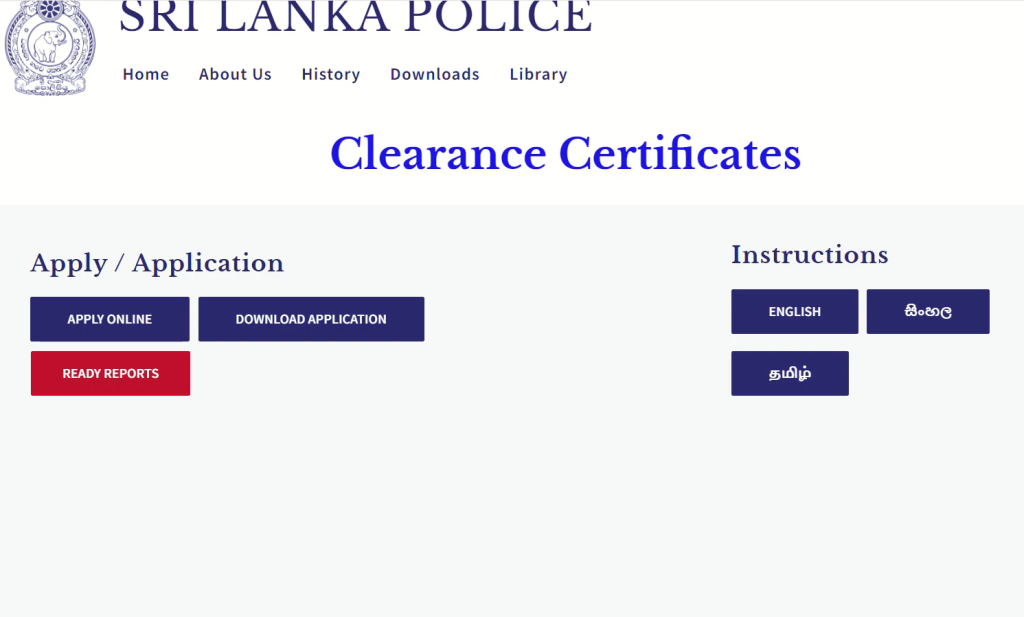
Reading these instructions will clarify any doubts you have. However, if you’re feeling confident, you can proceed directly to the online application. Still, I recommend at least a quick glance to avoid common mistakes.
Step 3: Start Your Application
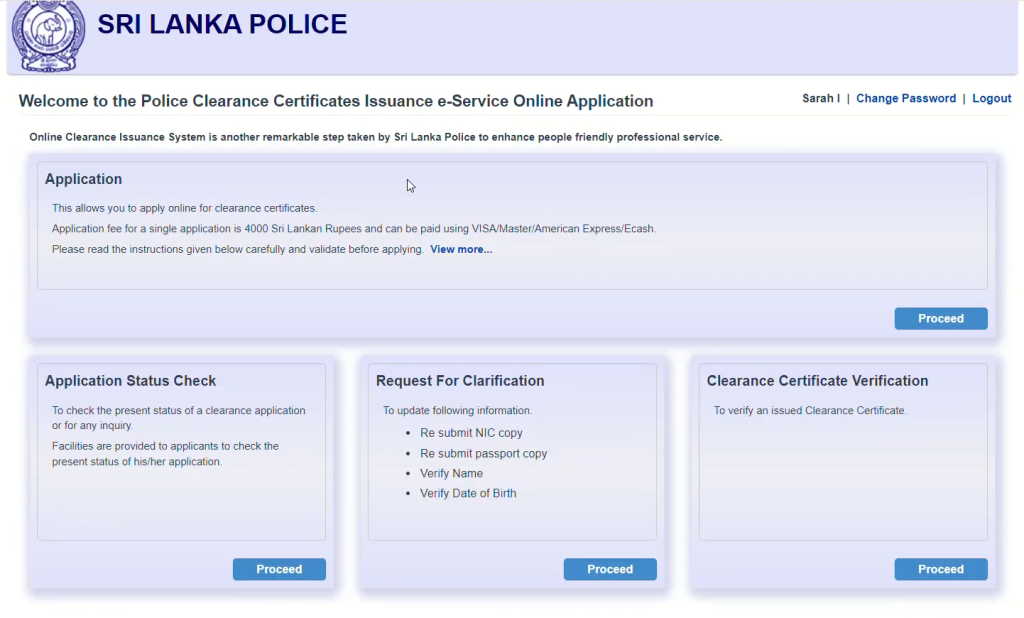
When you click “Proceed,” you’ll be asked to select an account to authenticate your identity. You can choose to sign in with your Google (Gmail) account, Hotmail, LinkedIn, or Facebook. This login step ensures secure access to the application portal.
Step 4: Logging In
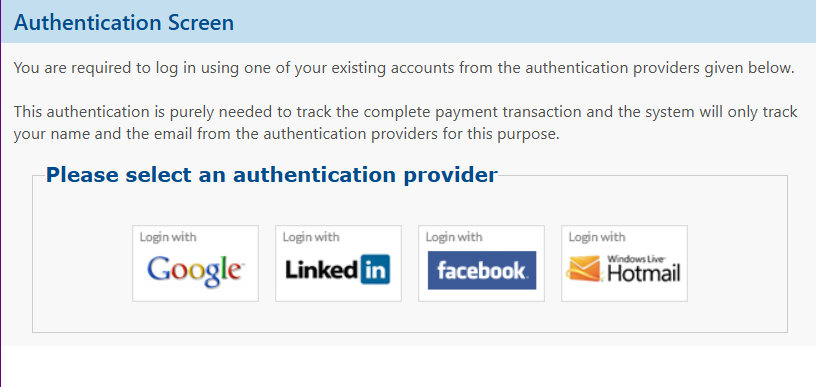
After logging in, you’ll be directed to the online application form’s main interface. If you were already signed into your chosen account before, you might skip seeing the login prompt and be taken directly to the application form.
Step 5: Starting a New Application vs. Renewal
On the application interface, you’ll see two options:
Choose “New Application” if this is your first time applying for a PCC or if you do not have a previous reference number. If you do have a previous PCC and reference number, select “Renewal,” and you’ll need to provide the old reference number to proceed. For this guide, let’s assume a new application.

Step 6: Basic Personal Details
You’ll now be asked to fill in basic personal details:
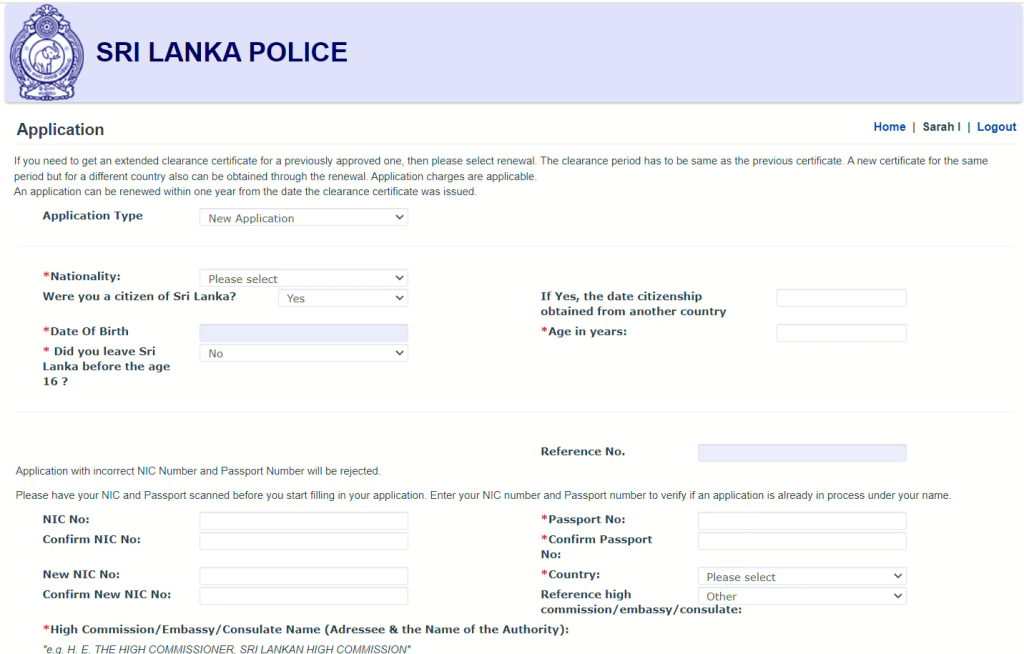
You’ll also see a reference number field. For a new application, this field is usually locked, so just leave it as is.
Must See: 10 Mistakes to Avoid Applying for a Sri Lankan Police Clearance Certificate
Step 7: NIC and Passport Details
You must provide your National Identity Card (NIC) number. There are two types of NICs:
If you have a new NIC, enter that in the “New NIC” field. Otherwise, use the “NIC number” field for the older version. You only need to fill in one of these fields, not both.
Next, enter your Passport Number.

Country and Authority:
Once you select the country and authority, the system automatically fills in the name of the official to whom the report is addressed. For instance, it might say something like “Visa Officer, Department of Home Affairs, Australia.”
Step 8: Verification via Captcha Text
After entering these details:
If it’s green, you’re good to proceed. If it’s red, double-check the information you provided.
Step 9: Personal and Contact Information
The next section asks for more details:
You’ll be asked which name should be printed on the PCC. You have two choices:
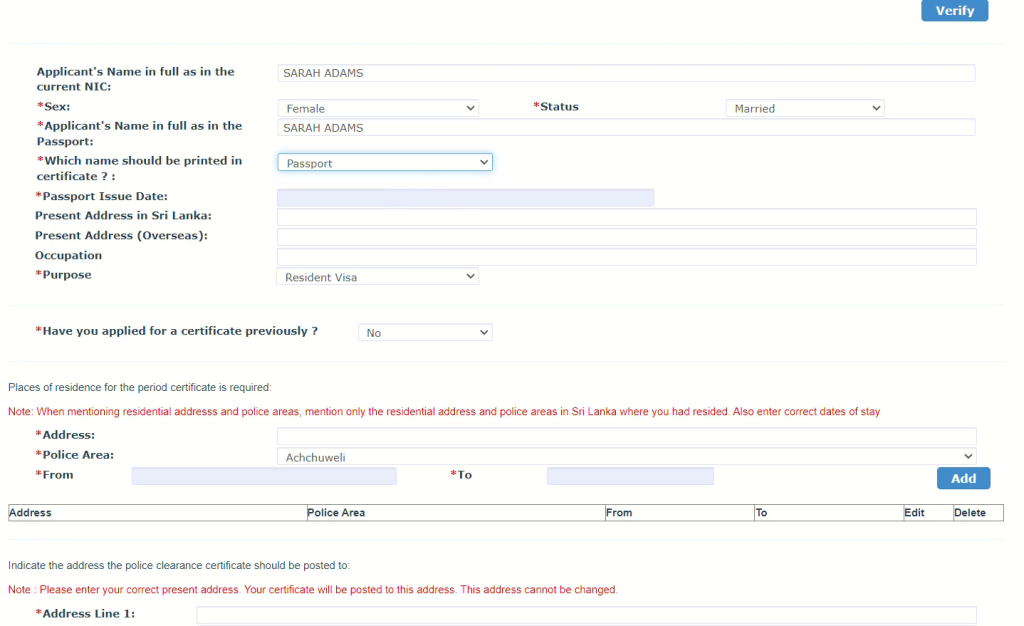
If you choose the Passport name and it differs from your NIC name, you will need to upload an affidavit later. If both names are the same, simply choose the NIC name to avoid extra paperwork.
Next, enter your Passport Issue Date. The present address fields are optional. You can leave them blank if you prefer. If you’re currently living or working overseas, you may provide your overseas address in the “Present Address Overseas” field, but it’s not mandatory.
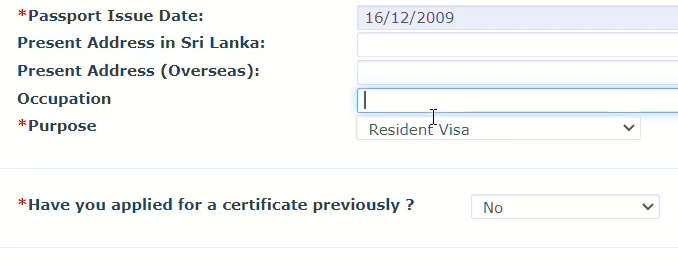
Occupation is optional. You can skip it if you want.
Step 10: Purpose of the Certificate and Previous Applications
You must specify the purpose of your PCC application as the common reasons include employment, resident visa, scholarship, or other official needs. Select the option that best fits your situation.
For example, if you’re applying for a resident visa in Australia, choose “Resident Visa.”

Have you applied for a certificate previously?
Step 11: Residential Details in Sri Lanka
The police need to verify where you lived in Sri Lanka to issue the PCC. Fill in the address details for the period the certificate is required:
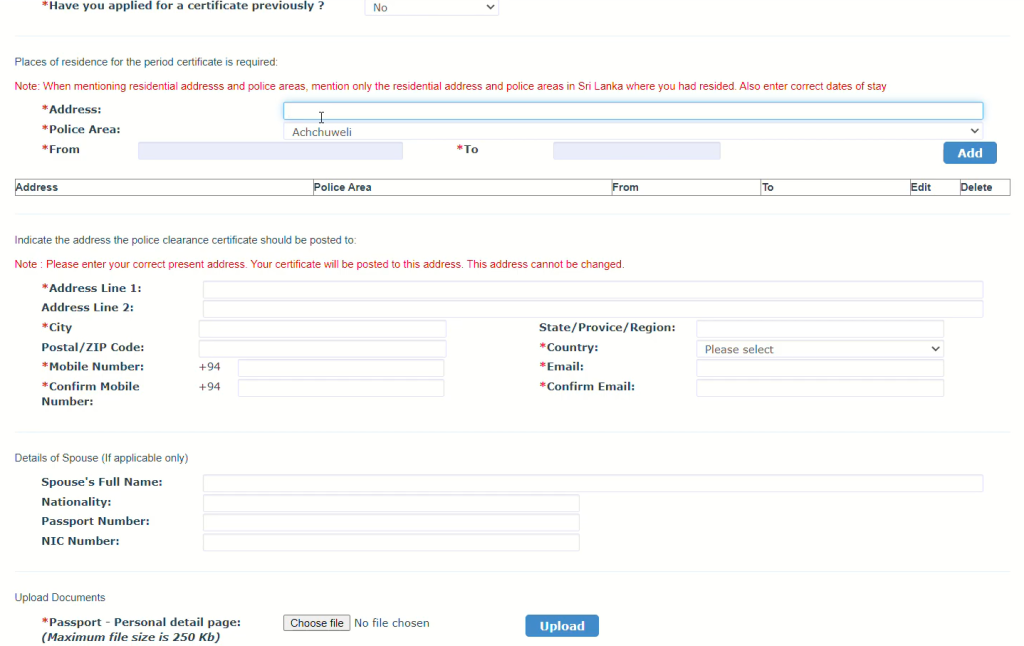
If you lived in multiple places, add all of them one by one. Click “Add” to include each address. If there’s only one address since birth, just add that one.
Step 12: Postal Address for Delivery of the PCC
Provide the mailing address where you want your physical PCC to be sent. Note that even if you’re overseas, you can give a local address in Sri Lanka to which the certificate can be posted, and then have someone forward it to you.

These details are important because your PCC will be physically posted to this address.
Step 13: Spouse Details (Optional)
You may enter your spouse’s details if you wish, but it’s not mandatory. You can skip this section if it’s not relevant to your application.
Step 14: Uploading Documents
This is a crucial step. You need to upload scanned copies (or clear photographs) of certain documents. Make sure these documents are clearly visible and valid.
Required Documents:
If you chose to print the certificate under your Passport name (and it differs from your NIC name), you must also upload an affidavit to validate the name difference. The application form will indicate if an additional document is needed.
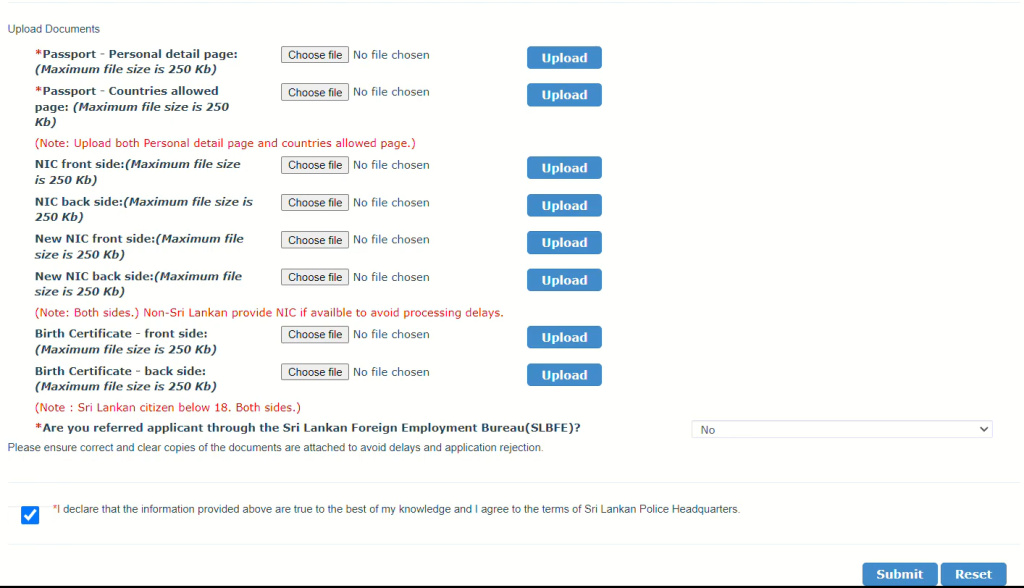
By the end of this process, you should have multiple green ticks confirming all required documents have been successfully uploaded.
Step 15: Foreign Employment Bureau Reference (If Applicable)
If you were referred by the Sri Lankan Foreign Employment Bureau, select “Yes” and provide details. Otherwise, select “No.”
Step 16: Declaration and Submission
Check the box to declare that all the information you have provided is true and accurate. Once you are confident everything is correct, click “Submit.”
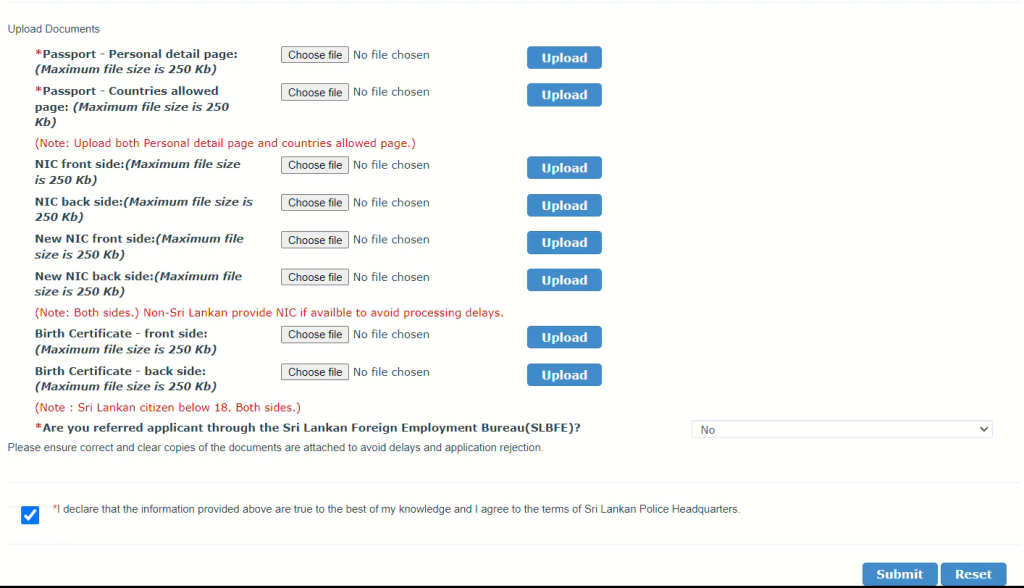
Don’t forget to note down your reference number as it may be used afterward.
What Happens After Submission?
Once you submit, you’ll be directed to the Payment Gateway. Here’s what to do next:
You will receive an SMS (if you provided a Sri Lankan mobile number) confirming receipt of your payment and application, along with the reference number. Make sure to note down or save the SMS details.
How Long Does It Take to Receive the PCC?
Typically, processing and mailing the Police Clearance Certificate can take about 2 to 3 weeks. Delivery times may vary depending on your location and the current processing speed at Police Headquarters.
If your certificate is delayed, you can contact the Sri Lankan Police Headquarters. Provide your reference number for a quicker follow-up or you can check the status of your PCC. They can give you an update on the status of your application.
Tips for a Smooth Application Process
Here are some personally suggested tips to follow when you apply for police clearance certificate in Sri Lanka:
Frequently Asked Questions (FAQs)
Conclusion
Applying for a Sri Lankan Police Clearance Certificate has never been easier. With the online system, you can skip the hassle of standing in long queues, dealing with physical documents, or coordinating with various offices. From anywhere in the world, you can:
Within a few weeks, you’ll have your official PCC delivered to the postal address you provided. This digital-first approach simplifies your life, especially if you are overseas and cannot visit Sri Lanka in person.
Good luck with your application If you want to get PCC for other countries, please checkout:
